 I do my book layouts in Apple Pages. Yes, I should be using InDesign. No, I don’t want to pay $35/month for something I use once a year. Apple Pages worked okay for layouts until version 5.0 came out in 2013, when they tried making the OSX and iOS versions have parity with each other, at which point they removed hundreds of features from the desktop version and said, “everything in the desktop version works on your iPhone!” (This, coupled with the move away from Intel, makes me fear the future, when there is no real Mac anymore, and they just have expensive iPads with keyboards, and they are useless for real work. That’s another rant.)
Anyway, Pages has evolved in the last seven years, and now I don’t have to keep an antique copy of Pages 4 to do layouts. I’ve done two books this year, mine and Keith Buckley’s, and Pages has more or less worked for them.
Here are my tips on how to lay out a book in Pages. This is not a complete guide, but maybe it will help you avoid any problems.
Basics:
- I write in Scrivener, then either copy/paste all of the text into Pages, or export to a .DOCX and open that in Pages. I’m sure you could write the whole thing in Word or Google Docs or even in Pages. Whatever works.
- I usually set everything to Body (see below on setting it up) and then go back and fix headings and first body paragraphs and such.
- After you do this once, make a template of that doc with all of the text scraped out and use that next time.
- I lock down all of my text before it comes to Pages. The spelling/grammar in Pages is better than Scrivener, but it’s still pretty piss-poor. I hate to endorse this, but Google Docs has a far better spellcheck because it’s constantly being trained on millions of words of text per second. I usually paste my locked text into Google Docs, do a check, and reconcile everything in Scrivener.
Numbering and sections:
- Document (the upper right corner button) > Document > Facing Pages gives you different left and right page layouts, which is what Pages broke forever.
- Always use section breaks, not page breaks. (It’s a bummer there’s not a keyboard shortcut for this.)
- In Document go to the Section tab, and set Section starts on to Right Page. (If you set this once before you change your page breaks to section breaks, it will ripple through the rest of the book. If it doesn’t, you might need to set this manually in every section.)
- You’ll have a bunch of front matter sections (title, copyright, TOC) and then the actual chapters. In the section where chapter 1 starts, set that to start at page 1. The first page of the first chapter should be 1. Leave page numbers off of every section before this. (Technically, the cover page should start with i, then go ii, iii, iv, etc (lowercase) through all the front matter, but you don’t need to get cute and show those numbers unless this is an academic journal.)
- In each section on Document > Section, it should be Match previous section and numbering should be Continue previous section. You should also set Left and right pages are different, and Hide on first page of section.
- Also on the above, you should set Section starts on to Right Page. This will result in every odd page being on the right, and every even page being on the left. This also means every chapter starts on the right page, with an odd number. Yes, this will result in blank pages. Books have been printed this way since the sixteenth century. Pick up any book that wasn’t self-published by someone in MS Word and look at the right page number. Trust me on this.
- …But, if you have a blank left page, this will screw everything up in Pages, of course. Blank left pages won’t count against numbering. So page 15 has text, page 16 is blank, and the next chapter starts with page 16 on the right.
- To fix this, you need to restart numbering with the correct number of the left page on the first page of the chapter. Don’t do this until your book is fairly locked down, because you’ll just have to redo it every time you add or delete a page.
- I always create a Header & Footer – left and Header & Footer – right and assign them accordingly. Put author name in the left header, title in the right. I’ve also seen book title left, story or chapter title right.
- I usually left-justify the left page number and right-justify the right. Marie, if you’re reading this, feel free to tell me I’m wrong here. I just noticed every David Foster Wallace book you designed centers them, and every one before you doesn’t. Maybe left/right went out of style in the early 00s and I didn’t get the memo.
- By the way, my “bunch of front matter” (and everyone else’s) is the following sections:
- A right page that’s just the book title and nothing else.
- An “also by” section on the back of that page.
- A right page that’s just the book title and author name. Maybe your press name and logo, but whatever.
- On the back of that, the copyright info and notice.
- Starting on a right page, The TOC.
- Also starting on a right page, any introduction, publisher’s note, preface, dedication, or whatever else. (Nobody ever reads any of this, so don’t waste your time. Trust me, I wrote book introductions.)
For the Title style used at the start of chapters:
- Delete any blank body paragraphs above or below the title. Each chapter should start with a single Title paragraph, then the body text. Don’t add a bunch of blank paragraphs to add space.
- Click on a Title. In Format (upper right button) go to Style tab, and set After Paragraph to the point size of your Body style (probably 11)
- The Before Paragraph doesn’t work for the first paragraph in a section. (But you can use Pages on your phone! It’s great!)
- A hack: Go to Layout tab. In Borders & Rules, set a top border of a single line. Make it 70 pt wide, then set its color to white. Select the top position, then put in an offset of 50pt. (If you could simply make this offset 130pt, that would be great, but you can’t for some damn reason.)
- After fixing the title once, make sure to update the Title style (a button will appear next to it when you make changes) so changes percolate to the rest of your Titles.
- I shouldn’t need to tell you that your titles should be sans fonts and your body text should have serifs.
Body text stuff:
- Go to an indented (i.e. not-first) paragraph and update Body so that’s the default style for all of your body text.
- Set that style to use justified text.
- Make a Body-first style based on Body that has no indent. Use that for the first paragraph of each chapter.
- I always assign a shortcut to that style to make it faster to use. I usually set Title to F1, Body-first to F2, Body to F3, and a Body-centered to F4.
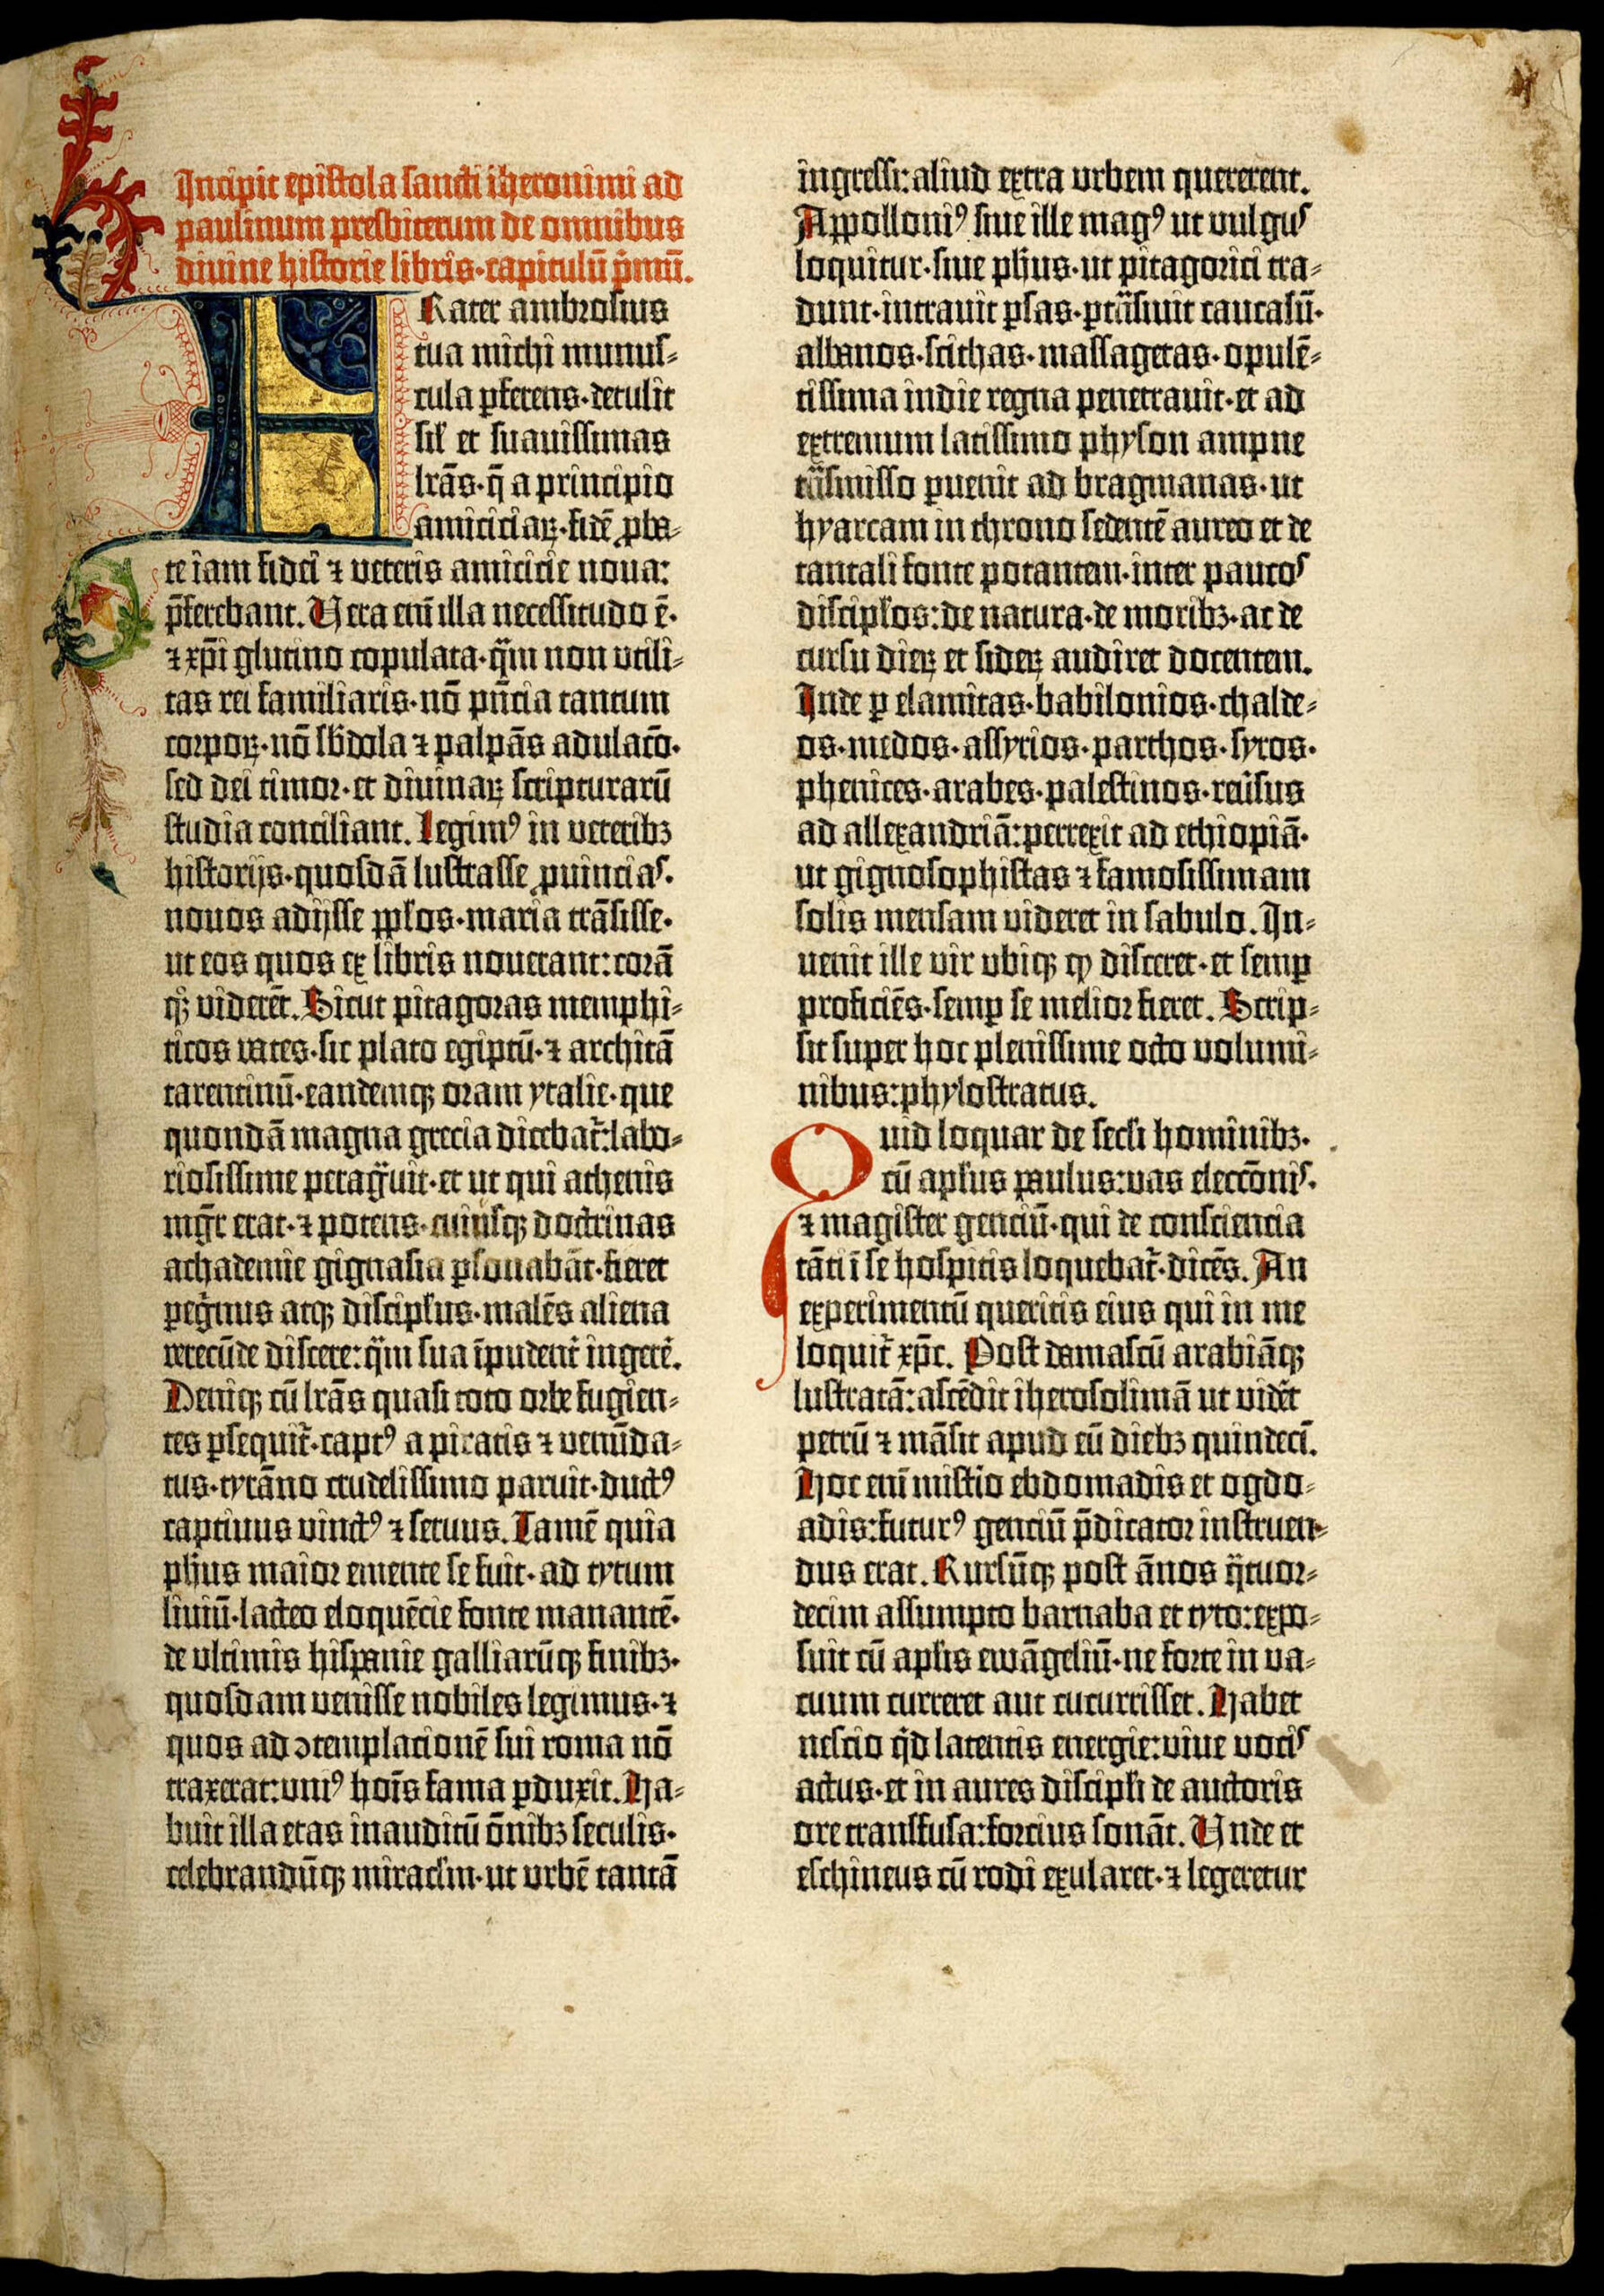
- I’m not into Drop Caps, but if you like having the first letter or first word of your chapter four or five lines tall like a Gutenberg bible, they finally fixed this in Pages. Go to Format > Style and there’s a Drop Cap option. Pick a style and set this in your Body-first style.
I’m probably forgetting stuff. And I’m sure I’ve pissed someone off by saying not to use a sans font for the body text. Also, I wrote this at the end of 2020. If you’re reading this in 2027 and none of it works anymore, it’s because Apple has changed everything seven times. Anyway, hope this helps.
Leave a Reply